Final Project - Autonomous Driving with Duckietown


Round 1
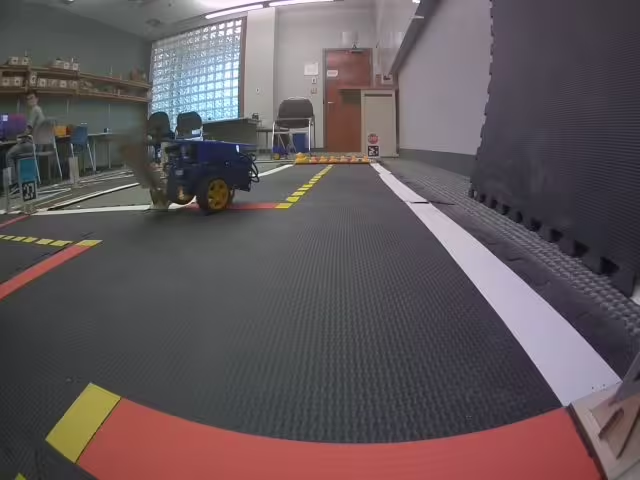
This was our best round, where we actually managed to park help-free, but had some issues with lane following as our understanding of the “stay within the correct lane” requirement assumed we could touch the yellow line, but turns out we can’t.
Round 2
We did better on not touching the yellow line, but as we hastily adjusted the tuning, the bot would lose the line and then go off the road. We also had some issues with the Duckiebot’s motors not turning as fast (likely as the bot’s battery percentage had gone down a bit), so we had issues with parking the bot effectively.
Round 3
We achieved similar results to round 2. An interesting issue is that we did not park as well in parking stall 2 and 3. In machine learning terms, we should have trained harder on the testing distribution. We only had the time to tune the parking parameters for stall 1 and 4, so the parking behaviour on stalls 2 and 3 was untested prior to the demo.
Stage 1: Apriltag Detection and Lane Following
Implementation
Akemi mostly worked on this part. After trying to be too clever, he switched over to a simple strategy the day before the project was due, having thought up the approach in the shower.
I started with the lab 4 code, which Steven had set up to read apriltags a month
back. I removed all the stale timeouts and distance measures of the apriltag in
the robot frame, storing just whatever was the latest seen apriltag on the
node’s instance. With a red-line detection, the bot switches a flag to True,
when it sees a sufficient “amount” of red line in its camera. Then, if the
flag is True and we no longer see the red line, that must mean the
duckiebot is almost perfectly positioned with its wheels on the line. At this
point, we look up the latest seen apriltag and make a hardcoded forward/left/
right movement to get through the intersection. I was sort of surprised how
well this worked right away.
Challenges
Most our problems came from mass murdering the Duckiebots… We ended up with 4 in our fleet, since something we did to them kept breaking them in different ways. Don’t worry, we asked for permission or made sure the bots weren’t being used in all cases
csc22902: Failed to boot, it’d get to the white light stage and just stay there for hours. Prior to that had a RAM usage issue, where Docker would just eat up all the RAM and stop building our containers.csc22920: (We used this one for the demo). This bot was unable to build usingdts, requiring us to extract the docker command used by Duckietown shell and run it directly.csc22927: Right wheel started clicking and getting stuck. We swapped the wheel withcsc22902’s, which fixed that issue. This bot occasionally had the high RAM usage issue too.csc22933: RAM overflow caused docker to be unable to build at all. We could fix this throughsystemctl restart docker.service… though that would break the camera container until wesystemctl reboot. The whole process takes about 7 - 10 minutes, so we stopped using this bot
Now the problem with working with so many different Duckiebots is that the tuning between bots was completely different. To make matters worse, tuning on a Duckiebot with < 60% battery consistently gave completely wrong numbers when the bot got fully charged again. This tuning issue resulted in our hard-coded turns sometimes going into the wrong lane, before lane following was re-enabled to correct them and sometimes our bot getting stuck in the parking stage.
Stage 2: Obstacle Avoidance
Implementation
First, Akemi has had it with the make-shift HSV masking we were constantly doing, so he quickly built it out to a proper software tool. Available here for an unlimited time only! Get it while it’s still uncommented!
Using this tool and the picture-saving node from lab 5, we quickly found HSV masks that were strong in all conditions, even working in both rooms, for the crossing duckies. We then used a Jupyter notebook to guesstimate the plan:
- Get a callback from the camera and crop it to about at 150 pixel strip, roughly in the middle on the image
- Apply our HSV mask
- Flatten the image into a single channel greyscale, using the HSV mask
- Turn all pixels picked up by the HSV mask to 1 and all others to 0
- Sum the pixels and compare with the threshold number we set. We found about 8000 was pretty good in the end
We only do this callback if the last seen apriltag is a crossing one. If this
callback returns True, the wheels immediately get killed. Then we scan every
second to check if there are any Duckie crossing, or rather if the sum of the
hsv mask pixels is higher than the threshold. If we get 3 consecutive 1s
intervals saying it’s safe to drive, then we go through the intersection and
switch to lane following. We used 3 intervals to fend off any possible noise
from the camera, especially important when Duckie lives are on the line.
For the going-around the broken Duckiebot, we again simplified the lab 4
following code to a single boolean indicating whether another bot is visible.
When it flips to True, the state machine initiates a sequence of completely
hard-coded movements to get around the bot, which actually ended up working
pretty well.
Challenges
The biggest challenge was Akemi not feeling like reading the rubric. Notably he missed the important bit about having to stop at all crossings, and not just charging through if there aren’t any Duckies in the way… Oops
We also initially tried to use English driving to get around the broken Duckiebot, but we kept running into issues with the bot doing a 180 rotation in its current lane and just driving us back to stage 1. The more we hard-coded this section, the more reliable our going-around got, so in the end we ended up with a complete hard-code that performed consistently.
Stage 2.5: Handoff
Since our group was crunched for time, we did our parts largely separately. So separately in fact, we were working on different workspaces. Since our code worked in our own workspace, we though up a pretty simple solution to merge the two: a service.
Both the parking node and stage 1-2 node start up immediately, though the parking node doesn’t do anything, simply checking once a second if its ready to start. When the stage 1-2 node reaches the end of stage 2, it makes a service call over to the parking node, initiating the takeover. The stage 1-2 node also unsubscribes from all topics to reduce any unnecessary load on the duckiebot. The shutdown for both is later signaled by the parking node, once it finishes parking.
We initially thought we’d be able to simply shut down the stage 1-2 node at this
point, though something about duckietown made that really not work. In fact it
resulted in csc22902 not being able to boot, from which it never recovered, so
we steered really clear of that afterwards…
Stage 3: The Parking Lot
Implementation
Steven initially decided to take the computer vision “dark magic” he learned in Martin’s infamous CMPUT 428, to fuse measurements the time of flight (TOF) sensor, apriltag detector, camera, and odometry to get perfect parking every time. We intially used the camera to both calculate our pose relative to the april tags and by computing the vanishing-point of the yellow parking lines to attempt to center ourselves in the lane. Unfortunately, not only is this quite complex task, the camera sensors and apriltag detections were not reliable and consistent enough. Our final solution ended up using just the TOF sensor.
The only measurement TOF gives is a fairly accurate forward distance with only a few degrees of field of view, which is problematic when we need to figure out our pose in the parking lot. With some clever thinking, Steven made the bot systematically wiggle left and right, until it detected the apriltag opposite of the entrance with the TOF sensor! This would give a good distance estimate relative to that apriltag. After driving to a specified distance to it, the bot would turn towards the parking stall opposite to our desired one. Next it again did a wiggle to find the apriltag in the opposite stall, aligning itself such that the TOF sensor reads the minimum distance. This allowed us to tell the apriltag apart from the wooden-backboard. Once aligned, we just just reverse into the parking stall, until the TOF sensor read a distance over 1.15 m (the TOF sensor goes out of range after approximately 1.20 m). We then reversed a bit more to make sure we were fully in the stall. This strategy was fairly robust and reliable as long as the parameters were tuned correctly. As a bonus, it is completely invariant to lighting conditions, so in theory, we could park well even with the lights off.
Challenges
A major challenge was that there was not a lot of time to tune the parking parameters. We had only the time to tune for parking stalls 1 and 4, and we were tested on parking stall 1 which we tuned for and parking stalls 2 and 3 which were completely untested. If we had more time, we would have tuned for all stalls so that we could have a more reliable parking solution.
Particularly on csc22920, the left-turning was much stronger than
the right turning, which meant we needed to use a very asymmetric force between
the two directions. We found right turns that used an omega 3 times higher than
the left seemed to truly balance things out.
Luckily, Steven pulled off a miracle and guessed the correct tuning parameters seconds before our first demo. It struggled to work well 2 minutes before our demo, but the parameters guessed worked perfectly.